
Getting Started
Install Yedric from the Shopify App Store and get a chat answering real shopper questions on your storefront in about five minutes.
This guide takes you from installing Yedric to a chat that answers real questions on your storefront. Plan for about five minutes. Most of the work happens on its own while you go through the steps: Yedric starts reading your store the moment you install it.
By the end, shoppers will see a chat button on every page of your store, and your assistant will answer them from your own products, pages and policies.
Step 1: Install the app
Section titled “Step 1: Install the app”Find Yedric in the Shopify App Store and click Install. Shopify asks you to approve the access the app needs to read your products, pages, policies, orders and customers. Approve it, and Shopify opens Yedric inside your admin.
You can always get back to it from Apps in the left sidebar of your Shopify admin. Pin it there if you like.
While you are reading this, Yedric is already creating your assistant and reading your catalog.
Step 2: Choose a plan
Section titled “Step 2: Choose a plan”The first time you open the app, it shows the Plan page so you can pick where to start.
[image:Screenshot of the Yedric Plan page in the Shopify admin (Apps > Yedric > Plan) on a newly installed store with no plan yet: the “Your plan” section reads “No plan yet” and “Choose a plan below to start. You can change it any time.”, with the Free and Pro plan cards side by side below it. Spotlight the “Start 7-day free trial” button on the Pro card.]
- Free includes 50 AI conversations a month, with order lookup, order tracking, returns, live chat and custom replies.
- Pro includes 500 AI conversations a month and adds size finder, product recommendations, abandoned cart recovery, order changes, fully automated returns with prepaid labels, and Ask Yedric in POS. It starts with a 7-day free trial.
You can change plans at any time. See Plans and billing for the details.
Step 3: Work through the setup guide
Section titled “Step 3: Work through the setup guide”Click Yedric in the sidebar to open Home. On a new store, Conversations and Analytics are not in the sidebar yet; they appear once shoppers start chatting. The Set up your assistant card at the top lists five steps, with a counter such as “2 of 5 done” and a progress bar.
[image:Screenshot of the Yedric Home page in the Shopify admin (Apps > Yedric) on a newly installed store, showing the “Set up your assistant” card with its five rows: Learn your store, Who answers, Name and voice, Test it, and Go live. Spotlight the “Learn your store” row with its “In progress” badge and progress bar.]
Learn your store
Section titled “Learn your store”There is nothing to do here. Yedric reads your products, collections, pages, policies and blog posts, and the rest of your website, such as shipping and FAQ pages. The row shows its progress and, once it finishes, what it read, for example “Read 214 products, 18 collections, 12 pages, 4 policies.”
You can move on to the next steps while it runs. If reading your store fails, the row says why and offers Try again now.
Who answers
Section titled “Who answers”Decide how support is shared between your assistant and your team, then click Save:
- My assistant first, then my team: It answers what it can and offers a person when needed. This is selected for you.
- My assistant handles everything: No live chat. Shoppers are pointed to your email when it cannot help.
- My team first: It answers quick questions and hands everything else to your team.
Once saved, the row offers Add your staff’s available hours if your team takes chats. Set them now or later: outside those hours, your assistant tells shoppers when your team is back. See Staff hours.
You can change this at any time on the Assistant page.
Name and voice
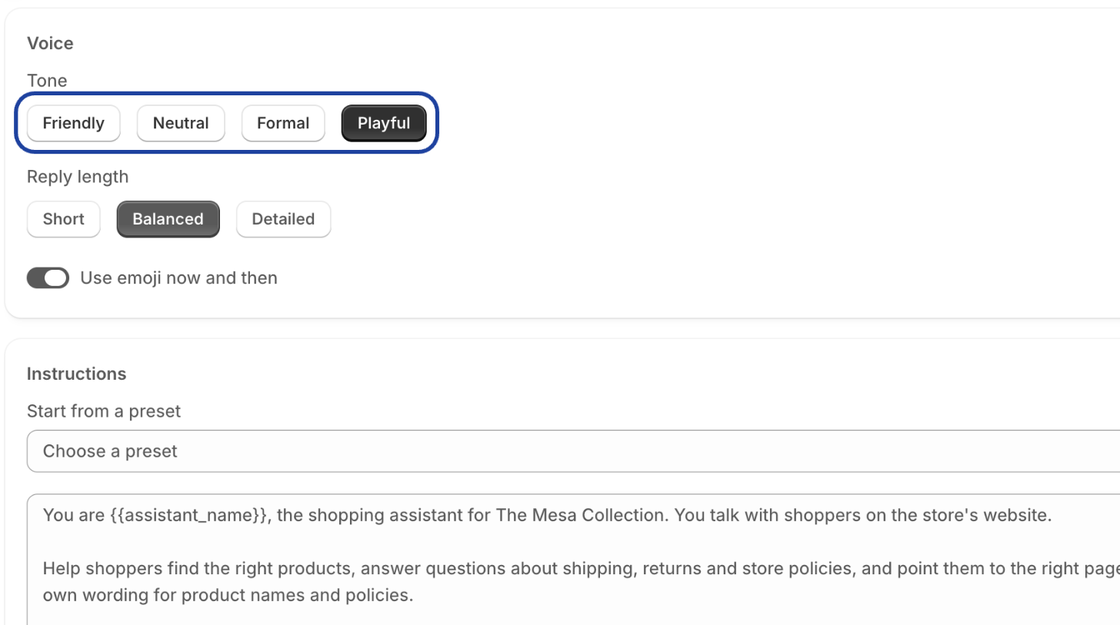
Section titled “Name and voice”Click Set up to open the Assistant page. Every field is filled in with a sensible default, so you can click Save right away and come back later, or:
- Give your assistant a Name and a Greeting, the first thing it says when the chat opens.
- Pick a Tone (Friendly, Neutral, Formal or Playful) and a Reply length (Short, Balanced or Detailed).
A preview of the chat on the right shows an example answer in the voice you picked, and updates as you change it.
Test it
Section titled “Test it”Back on Home, click Ask anything to open a real chat with your assistant, or click one of the questions shoppers ask most, such as Find a product, Track an order or Start a return. Every answer comes from your own store, not a script.
These test chats do not count toward your plan’s conversations. They are kept out of your analytics, and out of the Conversations list unless you ask to see them.
Go live
Section titled “Go live”Click Turn on in theme. Shopify opens your theme editor with the Yedric chat app embed ready to switch on. Make sure it is on, then click Save in the theme editor.
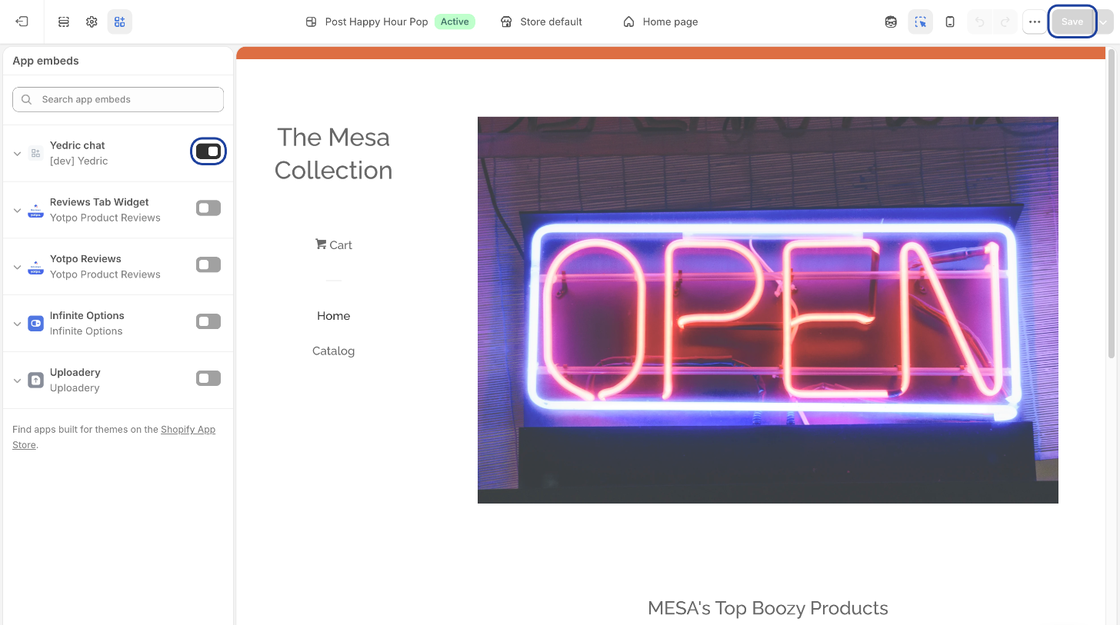
Come back to the Yedric tab. Within a few seconds the row changes to “Chat is on your storefront.” Nothing else on your storefront changes, and there is no code to add.
Yedric only checks the embed on your published theme. If you turned it on in a theme you have not published yet, it will show as off until you publish that theme.
Step 4: See it on your store
Section titled “Step 4: See it on your store”Click View storefront and open the chat button in the corner of any page. Ask it something a shopper would ask, like a question about shipping or a product you sell.
[image:Screenshot of a Shopify storefront home page with the Yedric chat panel open on the right side, showing the assistant’s greeting and an answer to “Do you ship to Canada?” that cites the store’s shipping policy page. Spotlight the chat panel.]
When every step is done, click Finish setup and the guide goes away. Everything in it stays reachable from the Assistant page. If you would rather not finish every step, Hide in the corner of the guide puts it away early.
What to do next
Section titled “What to do next”- Turn on more of what your assistant can do on the Capabilities page, such as Returns or Size finder.
- Write Custom replies for the questions you get most.
- Match the chat to your store’s look in Settings.
- Decide how your team picks up conversations in Live chat and the inbox.
- Check in on Conversations and Analytics once shoppers start chatting.